

How To Dual Boot Ubuntu And Windows 10
How to install Ubuntu 20.04 and dual boot aslope Windows x
Switching to Linux tin can be a big decision, depending on how yous use your computer. Sometimes, you just need Windows for specific applications, and sometimes you need Linux for other applications. Whether you lot are only curious or y'all need it for work or a personal project, having both operating systems on one computer can be useful.
In this commodity, I volition explain the steps you need to install Ubuntu 20.04 next to your existing Windows ten system.
Get your tools
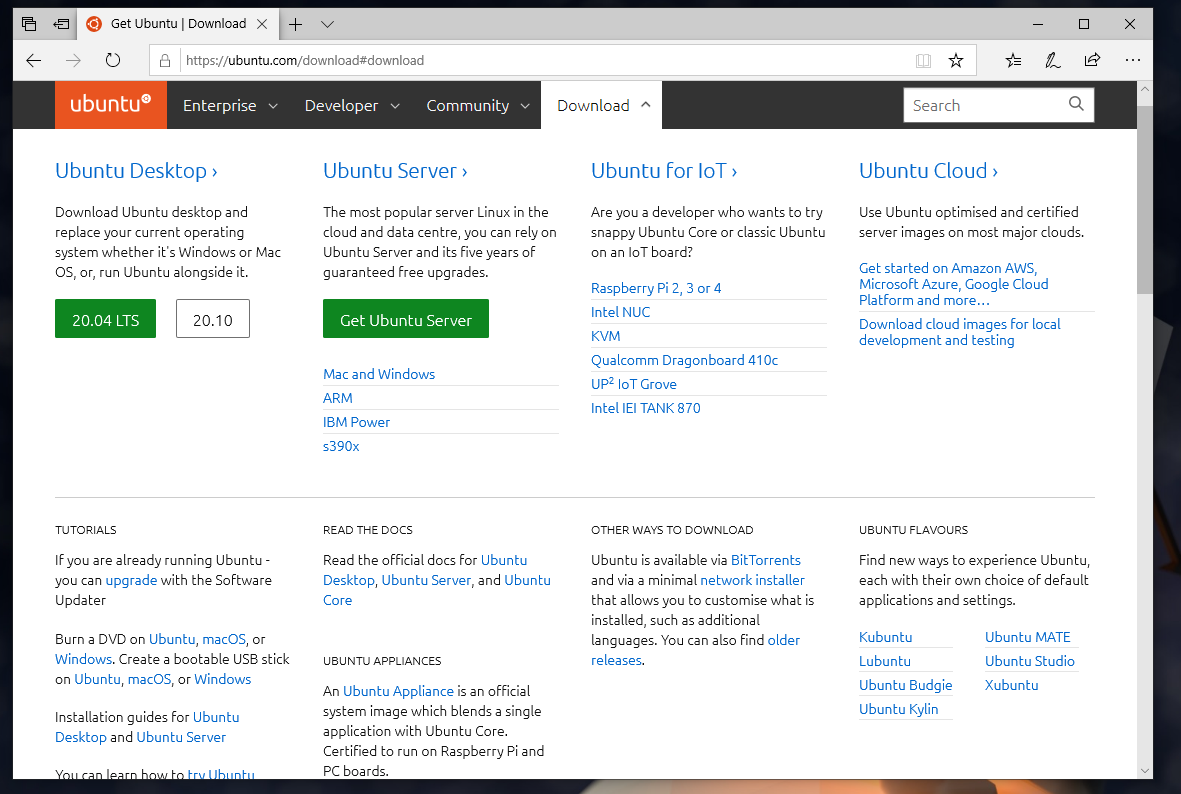
Before you tin can create an installation media, you first demand the right tools to create 1. The commencement thing is to download the Ubuntu ISO file that you want to install. An ISO file is but a file that contains the actual operating system in a compact format. Get to https://ubuntu.com/download#download and click on the 20.04 LTS button.
*LTS stands for Long-Term-Back up which only ways that this version gets support for v year unlike the other releases that are only supported for 9 months. Going for LTS is for many people the best option.
Your browser might inquire yous if yous desire to save the file or open it. I'd recommend to salve it. The ISO file is virtually 2.8 GB in size, so be prepared that it volition take a while. This is the perfect time to get some tea.
The side by side tool that you need is a software to create the installation media. There are several tools available such equally UNetbootin or Rufus. I personally am a large fan of balena Etcher.
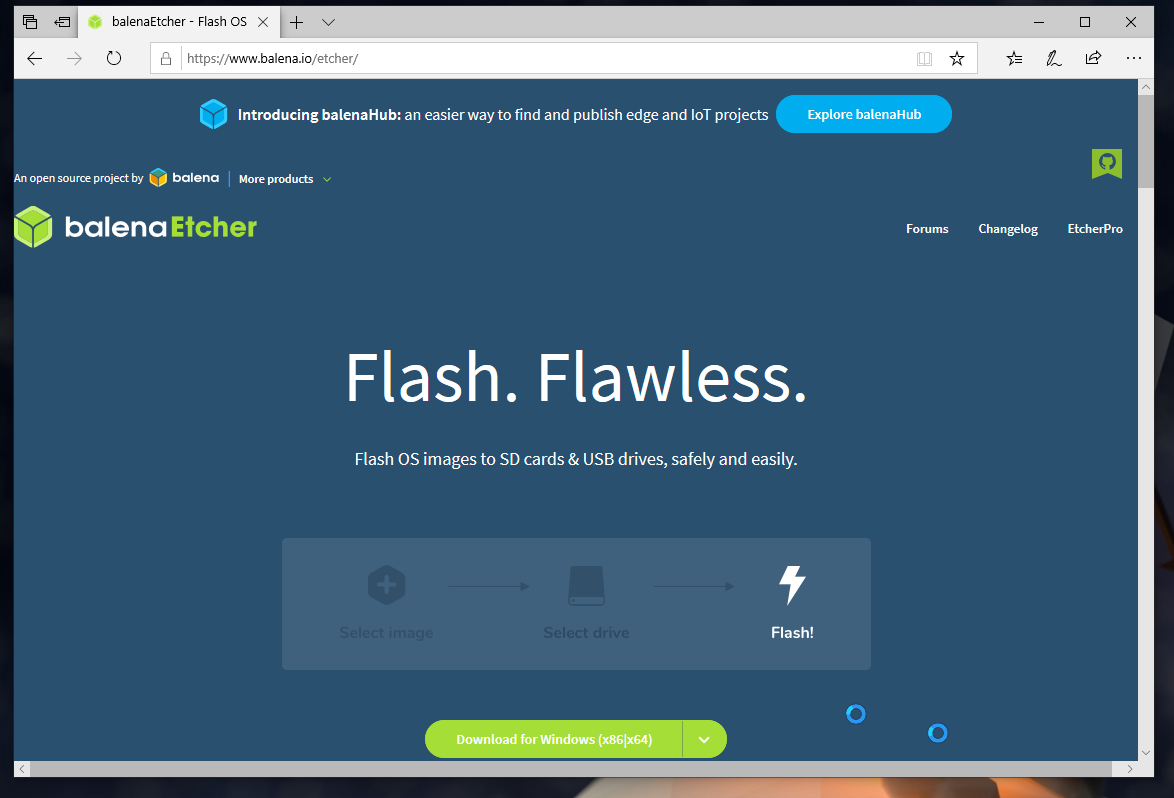
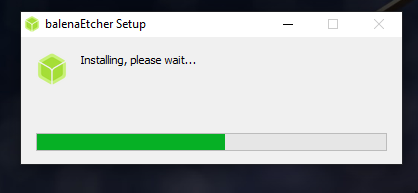
Etcher is available on Windows, MacOS and Linux and pretty easy to utilise. Afterwards the download has finished, you need to install information technology.
Getting your organization prepare
After you installed Etcher and downloaded the ISO file, you lot can create the installation media. You can either employ a CD (yes, those still exist) or simply a USB stick. Using the USB stick is the most convenient as you do not demand a CD bulldoze which start to exist come a rare antiquity. Make sure the USB stick is empty as all the information will be erased in the next footstep.
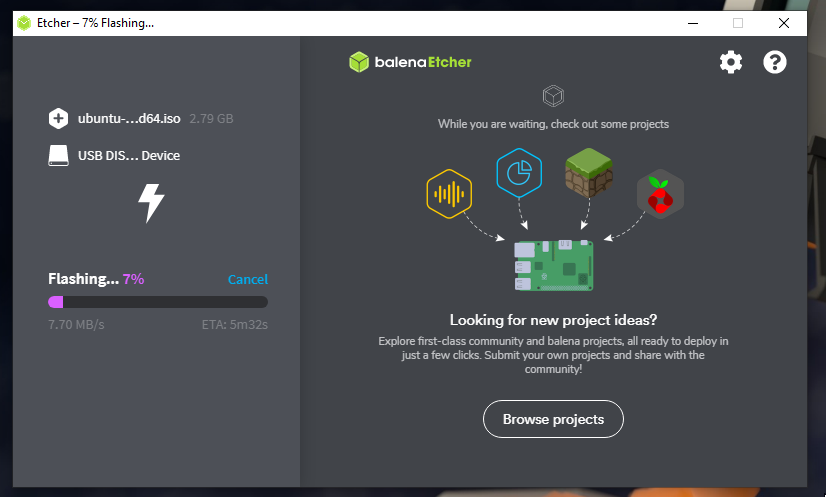
When you open Etcher, yous take a very unproblematic interface.
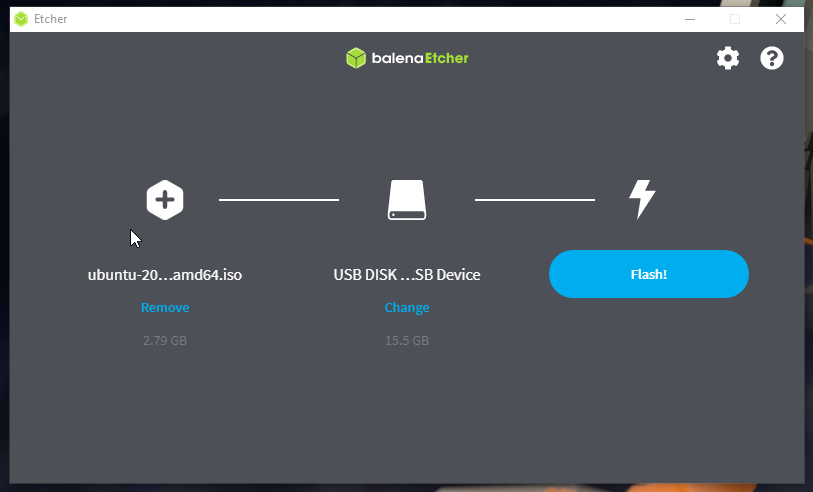
Start, yous select the ISO file that you want to use. You lot can probably find it in your downloads folder. Just navigate to it and select the ISO file. Then, you need to select the USB stick that you lot plugged into your computer and that y'all want to use every bit installation media. Accept care that yous select the right one every bit you don't want to wipe your internal hard drive or an external bulldoze. The easiest is to look at the size of the different options and select the ane with the retentiveness size that your USB stick has.
When the ISO and the USB stick are selected, click on the Flash! button. This volition too have a while.
Getting Windows Ready
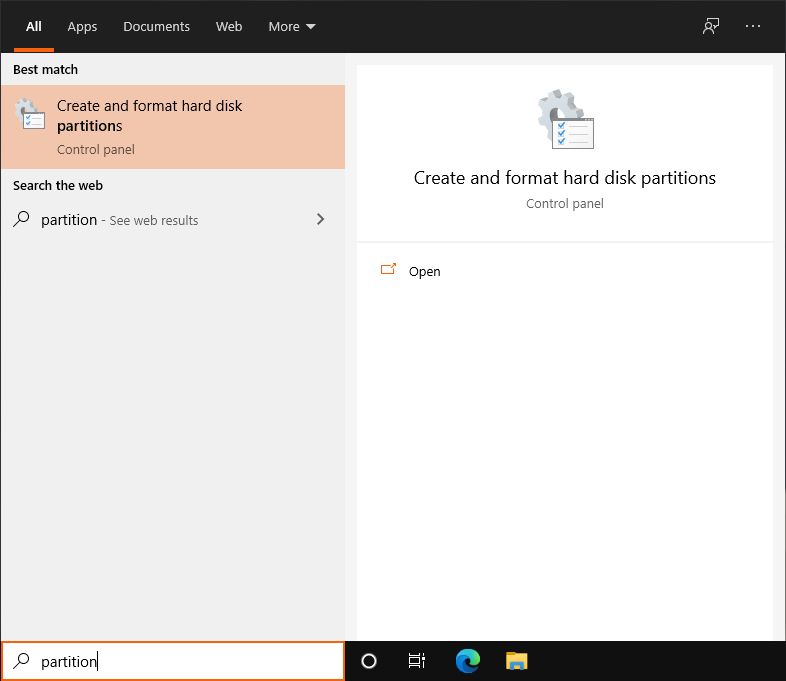
There is one more step y'all demand to do as preparation before the actual installation. You lot need to brand some free space on your hard bulldoze and so your computer knows where to install Ubuntu. For this, you lot need to open the partitions software with the proper noun "Create and format hard disk drive partitions". You can simple type the give-and-take "partition" in the search bar of the start menu.
When starting the partitioning software, a new window chosen Disk Management should open up. This program should show you all the mass storage devices connected to your computer, internally and externally. In my case, I only have one hard drive because I already removed the USB stick and I just have one small hard drive in my demo setup.
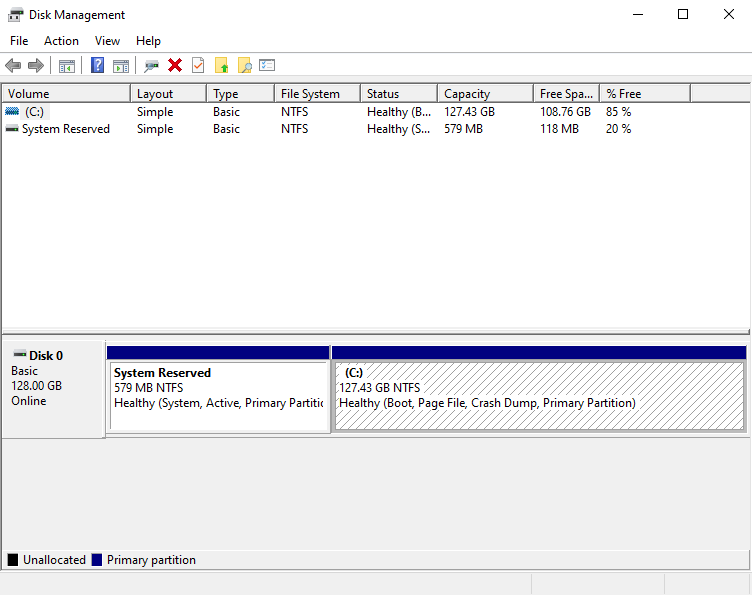
Many computers nowadays take one smaller SSD difficult drive and a larger HDD hard drive. Yous will probably desire to install Ubuntu on your SSD drive, given that you take enough disk space.
For a bare minimum installation, you should accept at to the lowest degree 9 GB. If you too want to install some programs and salvage some files on Ubuntu, then you lot probably desire a lilliputian bit more than storage for your Ubuntu system. I would recommend at least 36 GB to make sure you lot don't run out of disk infinite when have all the Ubuntu partitions on i difficult drive. You can use less if you want to install Ubuntu on two hard drives: 1 for the system and i for storing your personal files. More on that afterwards.
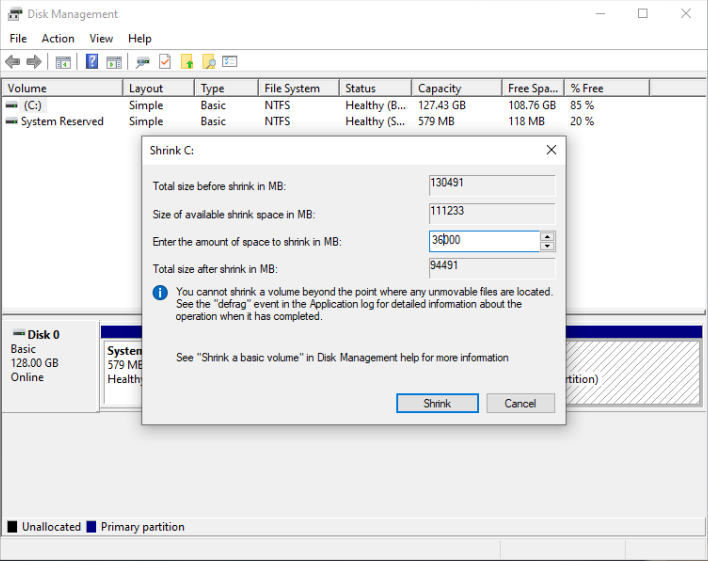
Correct click the division that yous want to compress to make complimentary infinite bachelor on. Then, click on the "Shrink Volume…" button in the context menu.
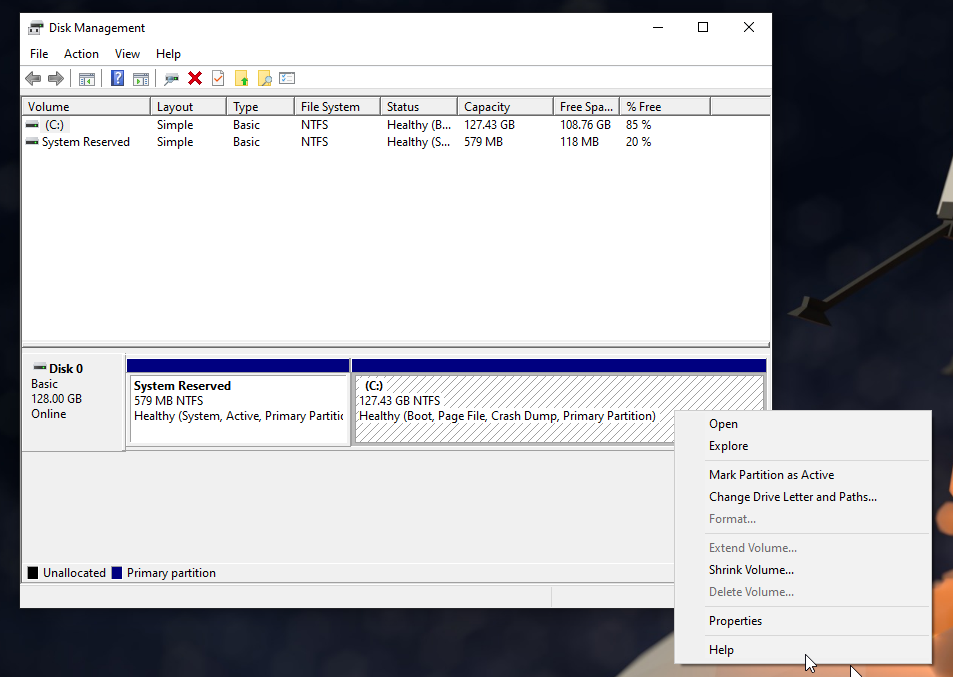
Next, you need to choose how much storage yous want to make available. Enter the corporeality of Mega Bytes you want to have for your Ubuntu installation. Again, I would recommend to have at least 36 GB. Click on the "Shrink" button.
Creating the new empty partitioning takes a while and then it should be displayed as Unallocated.
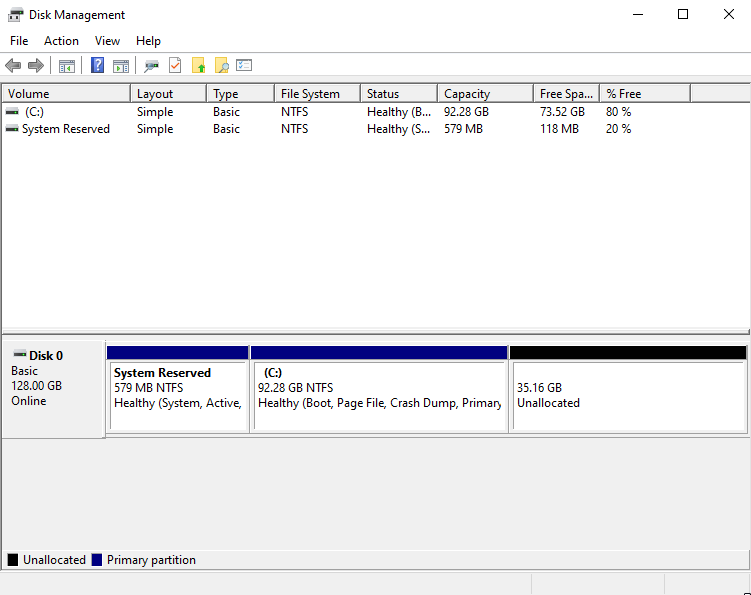
After this is done, you can proceed with the installation of Ubuntu. You may at present shut down your reckoner.
Installing Ubuntu
Now information technology is time to plug in the flashed USB stick and restart your computer. When the splash screen of your calculator'south manufacturer appears, y'all need to press either F1, F2, F12, ESC or DEL on your keyboard to enter the BIOS menu of your computer. Which key to press depends on the brand of your computer. Your computer might even tell yous which key to press. Else, y'all might need to await it upwards either in the manual of your figurer on online.
Once you entered your BIOS, you demand to find the pick to alter the kick order. The BIOS of each motherboard can exist slightly different. You lot need to navigate through it by yourself to find the pick to change the boot gild. When you find it, you should identify the entry for USB devices on the get-go position and so when yous restart the computer it will automatically boot from the USB stick with the Ubuntu installation media.
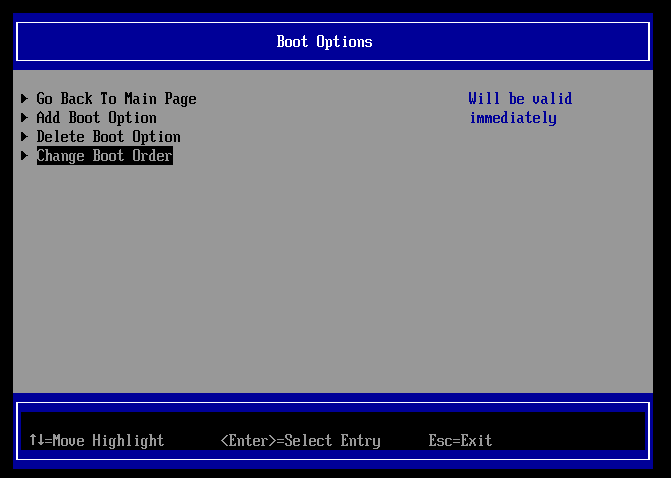
As an alternative, some computers even permit to directly choose the boot device to continue. In that case, you don't need to change the kick order and you lot can only select the USB stick to boot the estimator. Again, this depends on the manufacturer of the motherboard.
Annotation: If possible, disable the fast-kick option from your BIOS as this can cause problem when switching from Windows to Linux. The reason is that the fast-kick setting will prevent a total shutdown of the PC and when starting up in a different Bone, this could cause some issues. Likewise, the secure-kicking option might need to be disabled. If that is the instance, Ubuntu will allow you know during the installation process. Y'all volition demand to blazon a password during the installation procedure so over again when rebooting. This password will only be asked once.
When your reckoner is booting from the USB stick, it volition show to you lot the Ubuntu logo. It might even perform a system check.
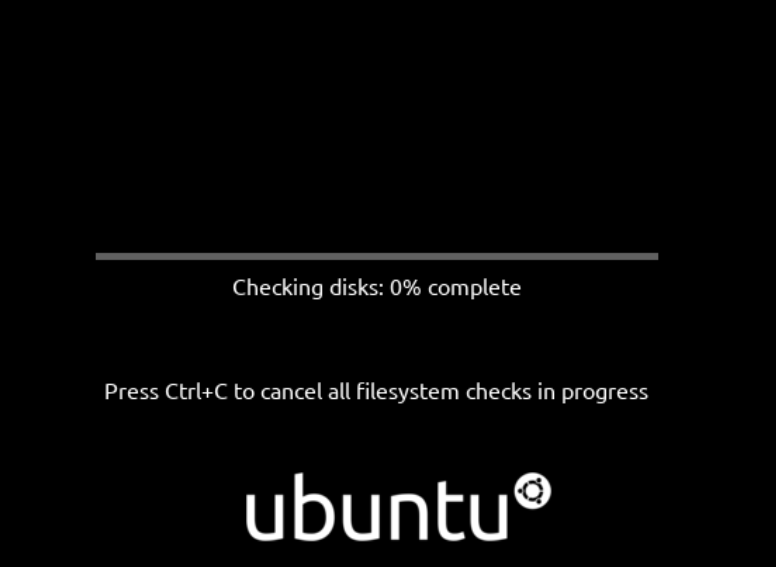
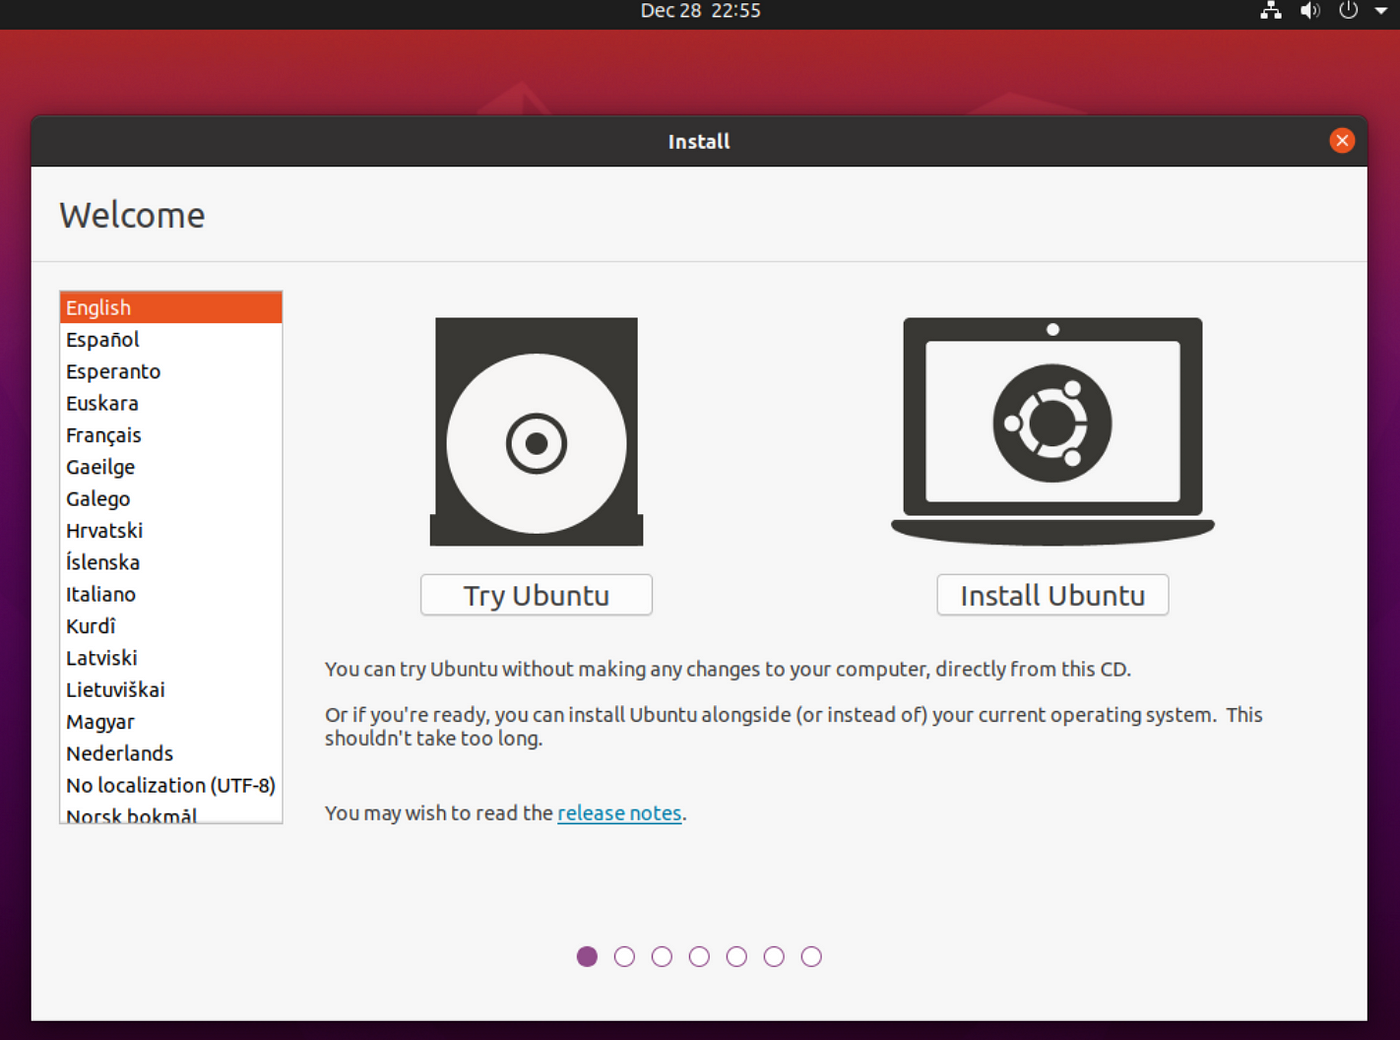
Afterward the file check is consummate, your estimator will show you the Ubuntu welcome screen where y'all tin can choose whether you want to "Try Ubuntu" or "Install Ubuntu". The first option is suited for testing if everything works such as the Wi-Fi drivers or other hardware. Y'all will choose the second option for the installation.
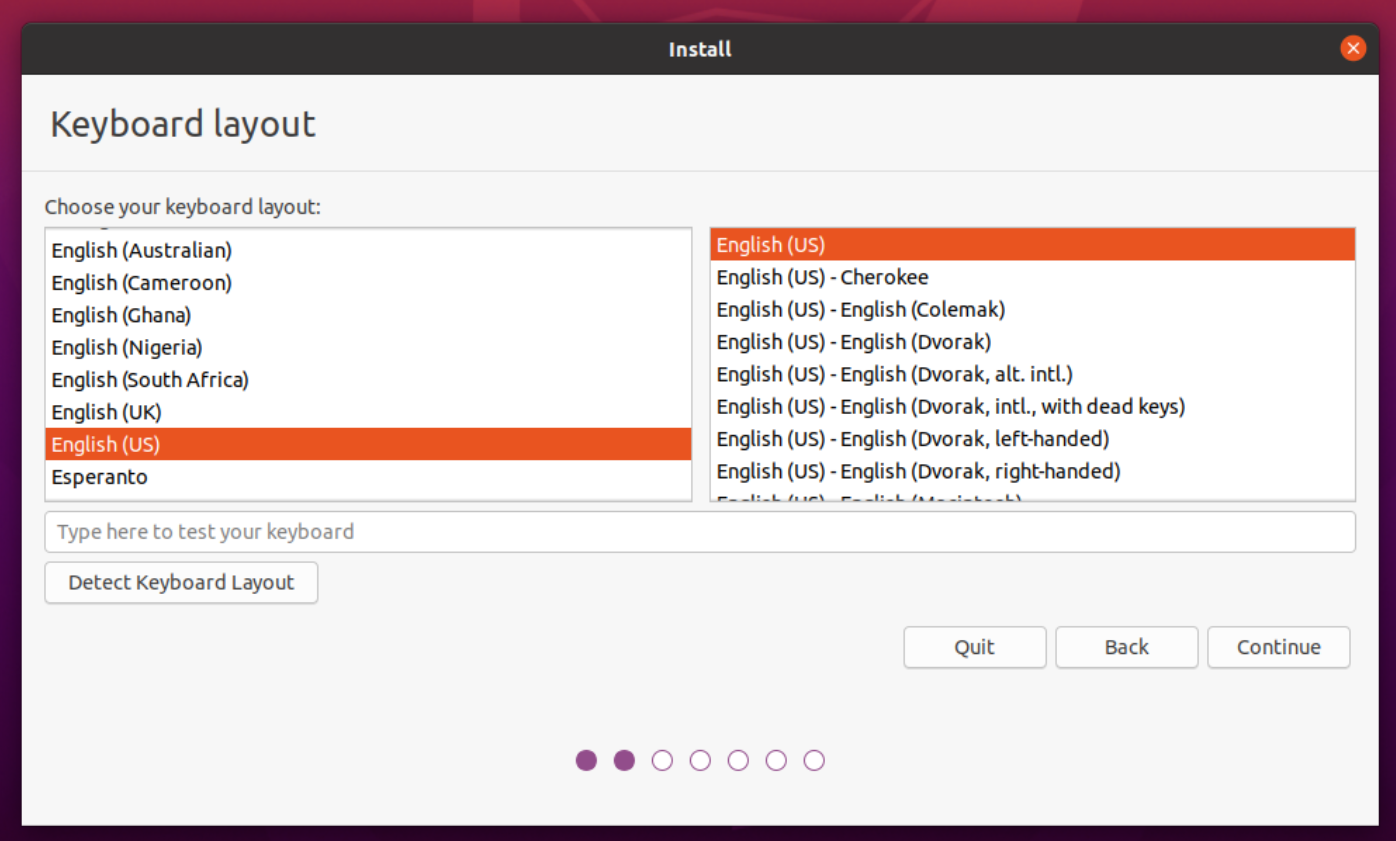
The first thing to do is selecting your keyboard lay out. This can exist inverse afterward and you tin besides add multiple layouts int he settings menu once the installation is finished. If you don't know what your keyboard layout is, Ubuntu tin can aid you to find your layout.
After you selected the keyboard layout and pressed on the "Continue" push, you lot will probably be prompted to select a WiFi network. In my setup, I utilise a Ethernet connection which is why this step is omitted by the system. Simply select the network and enter the password and that's it.
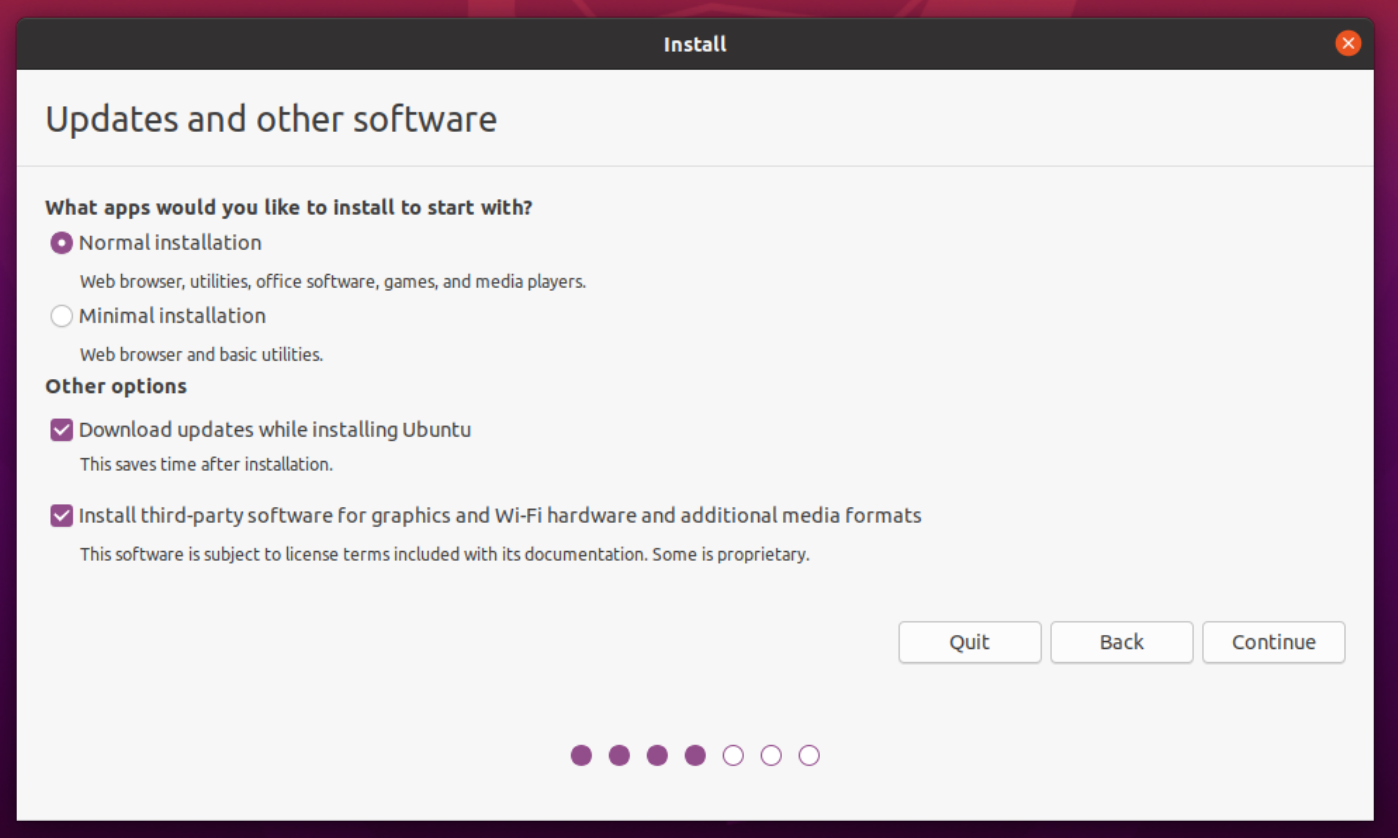
Side by side, you accept the pick to install Ubuntu equally normal installation or as minimal installation. If you are new to Linux, information technology doesn't injure to install the normal package including Libre Function, some games and some other tools. Likewise, you should check the boxes for downloading updates during the installation and to install 3rd-party software which include the GPU drivers for Nvidia and codecs for MP3 files.
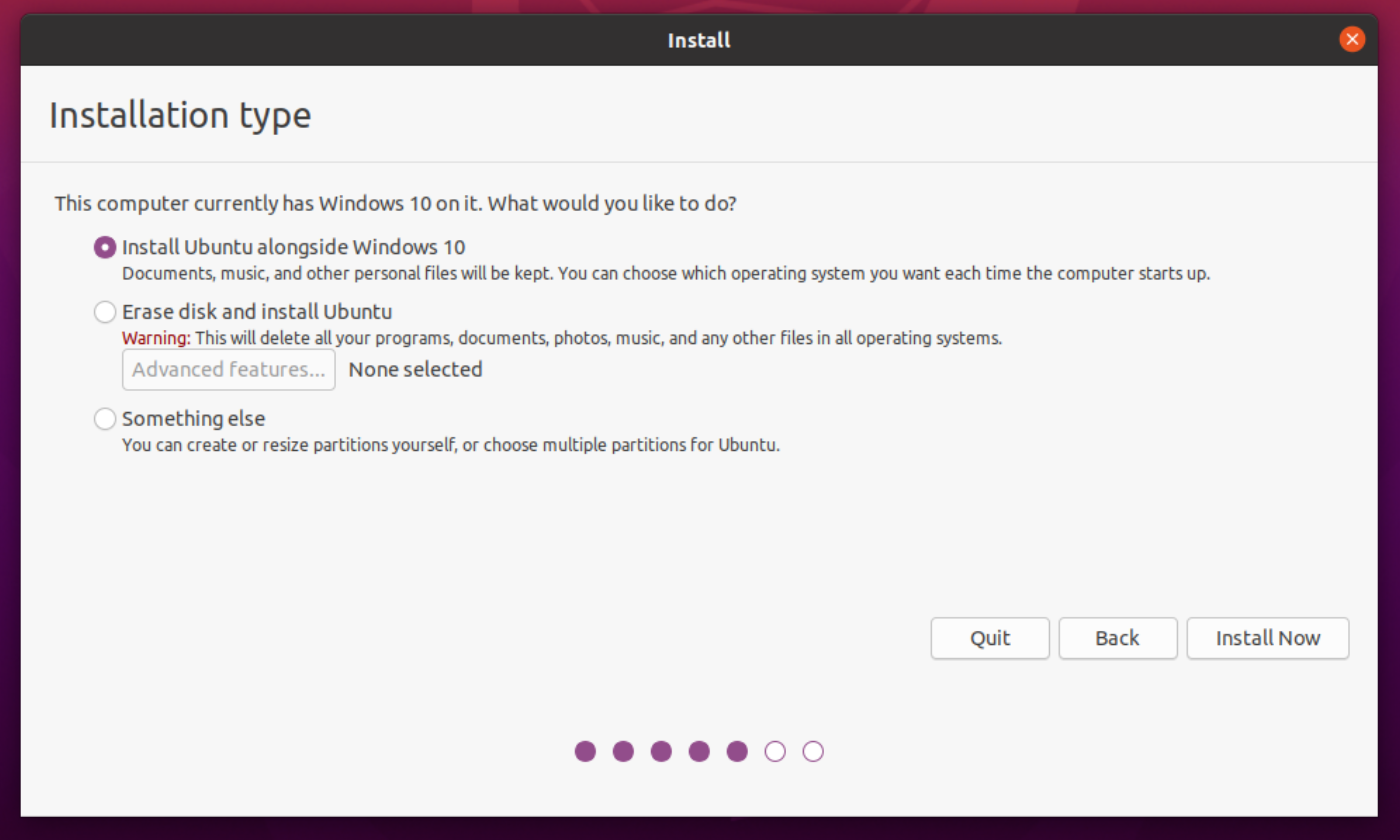
Now, you need to select how you desire to install Ubuntu on your system: wipe your entire deejay or install Ubuntu alongside Windows ten. I always apply the third selection chosen "Something else" equally this gives me more control on how I have my partitions. Besides, I accept trust problems with the automatic installation alongside Windows.
Now, you demand to manually set the partitions for the Ubuntu installation. As you tin can see, you have some costless infinite on your difficult drive. This is the space that you freed earlier in Windows.
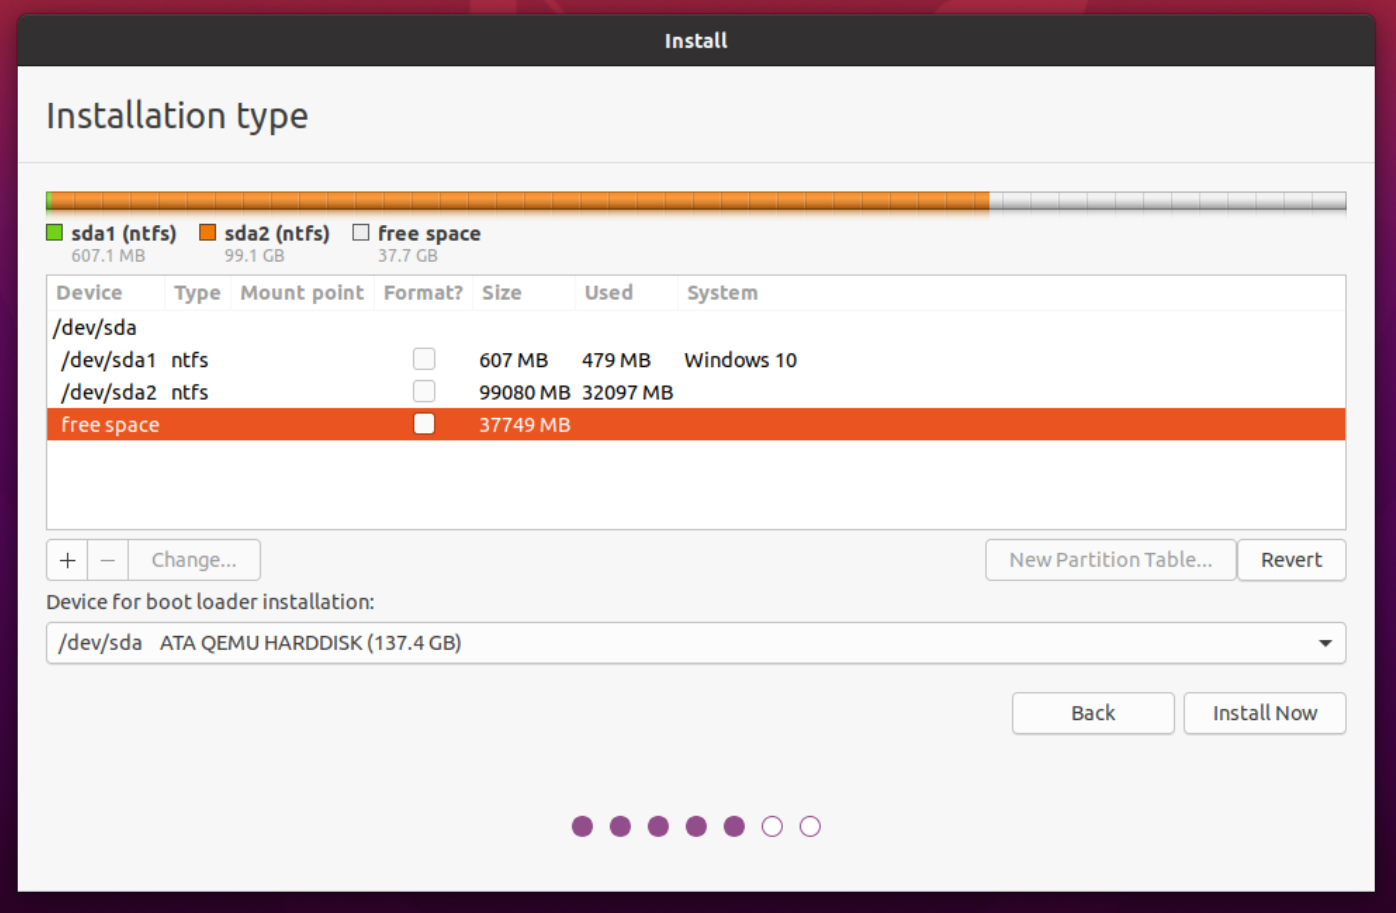
You could besides compress the partitions hither, but I recommend doing information technology on Windows equally this allows Windows to shift files around according to the modifications. When doing it here, yous chance to overwrite parts of the hard drive that were used for information.
Simply select the free space sectionalization and click on the plus symbol below to add a new sectionalization. The starting time division you will make is the SWAP sectionalisation. It serves as an extension to your RAM (Random Access Memory) which is the fast memory which it needs immediately to office. If your RAM is full, Ubuntu will then save additional data in the Bandy.
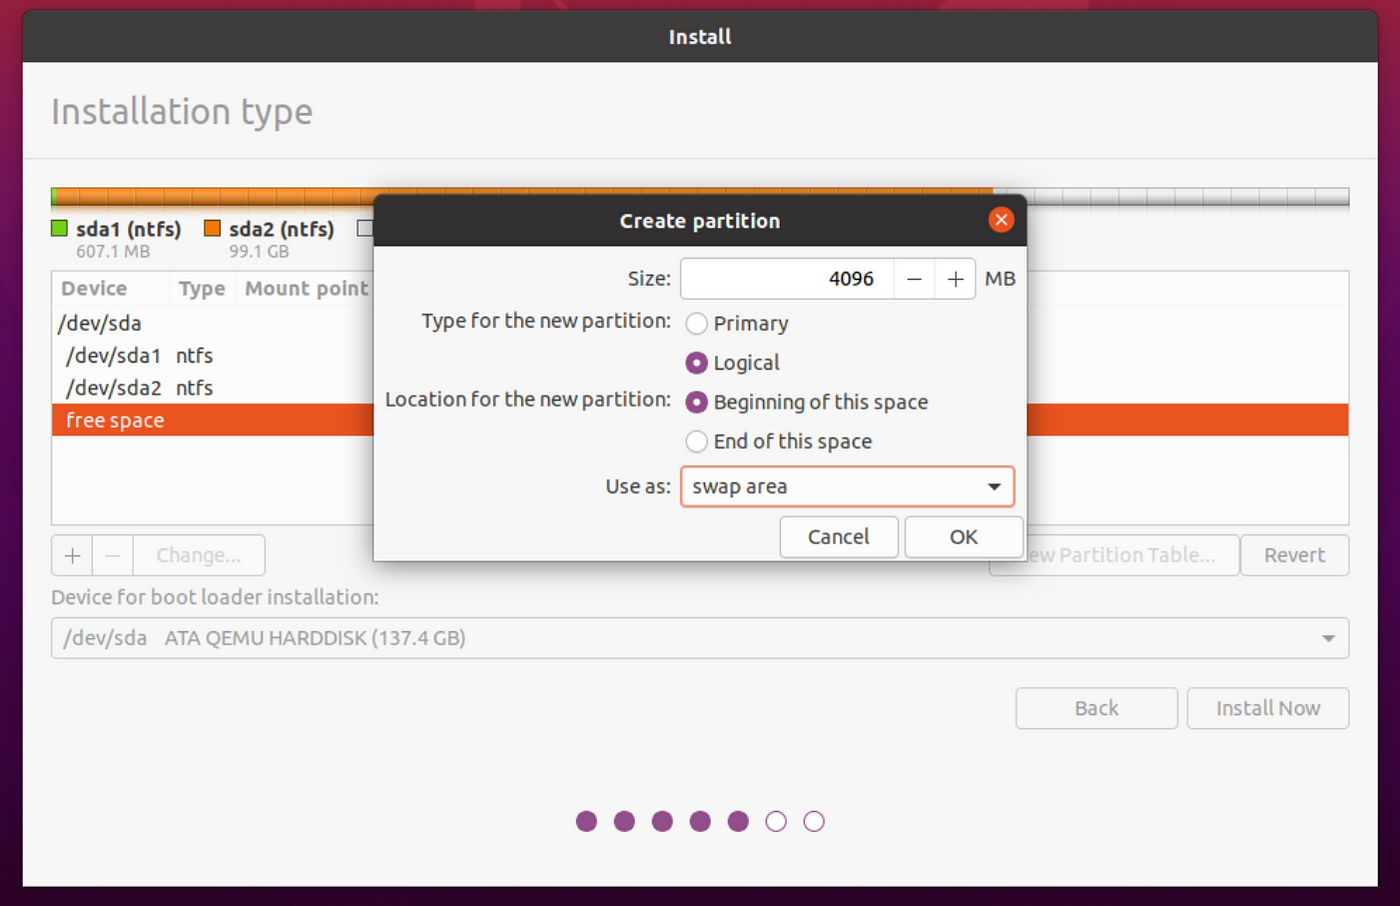
Notation: Almost guides I know of recommend to utilise double the size of your RAM for your Bandy sectionalisation and at least the same amount of memory as your RAM. Technically, you tin do without SWAP at all, but information technology doesn't hurt to have some SWAP in case your RAM is not that big. Near systems nowadays take at least eight GB of RAM.
The more RAM yous have, the less likely you need the SWAP memory. On this computer, I have 8 GB of RAM. Therefore, I utilize four GB for this installation. That should be plenty. Choose "Logical" for the partition type and select "swap area" from the drib downwardly carte. Then clock "OK".
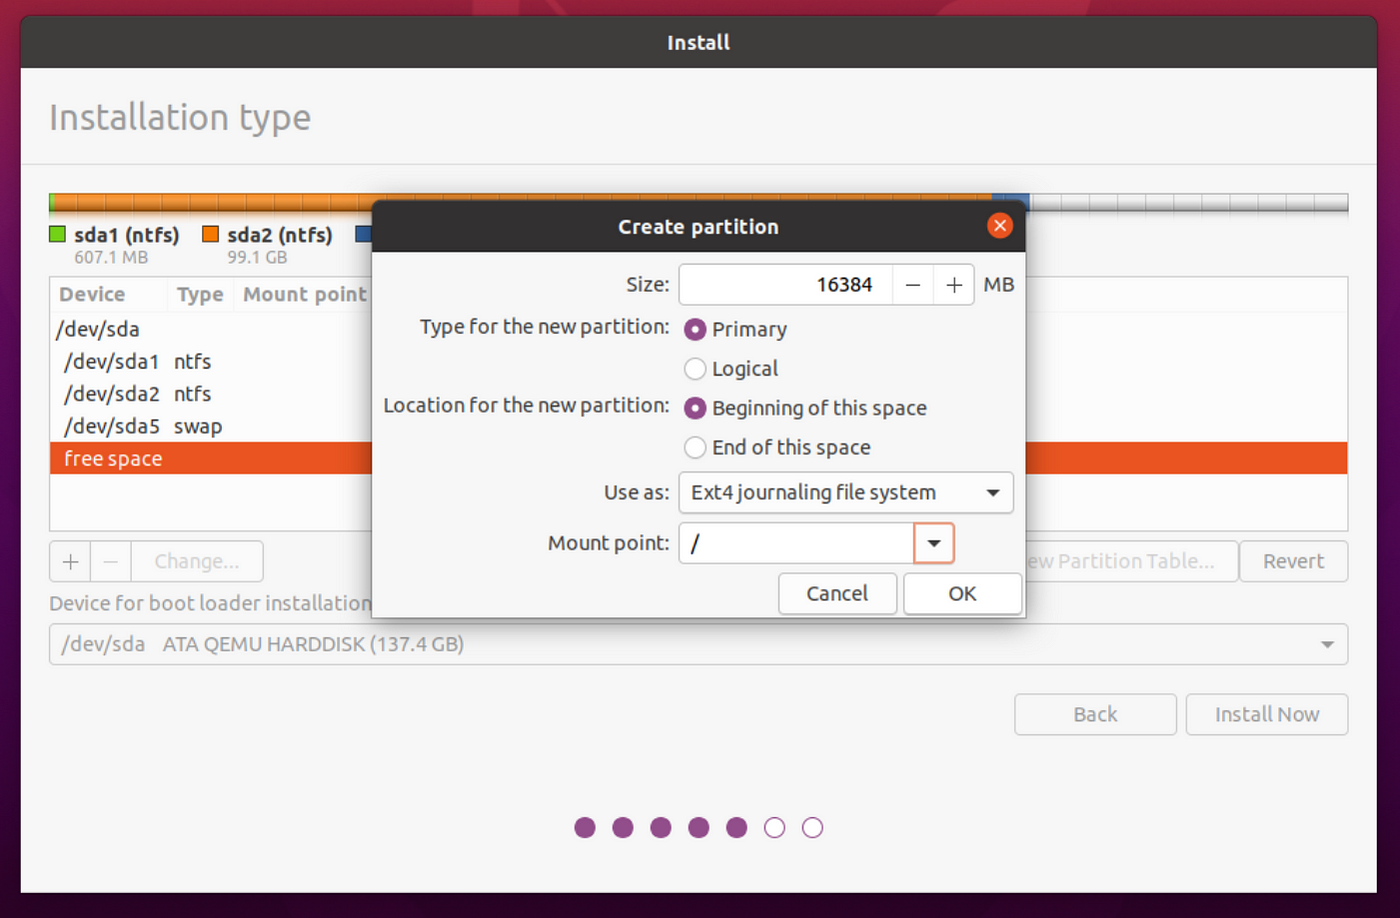
Next, you demand the so called "root" sectionalization which hosts all your system files necessary by Ubuntu to function. By default, this division will as well contain your personal files, but hither nosotros will create a separate partitioning simply for your personal files, such as your "Downloads" folder or "Music" binder. This is why we demand to create two more partitions.
Both partitions volition be about 16 GB in size. For the "root" sectionalization, select the "Primary" option for the sectionalisation type every bit this sectionalisation needs to be bootable. And then, in the drop downwardly bill of fare, select "Ext4 journaling file system" which is even so the default file system for Linux. The mount point must be "/" which stands for the "root" partition.
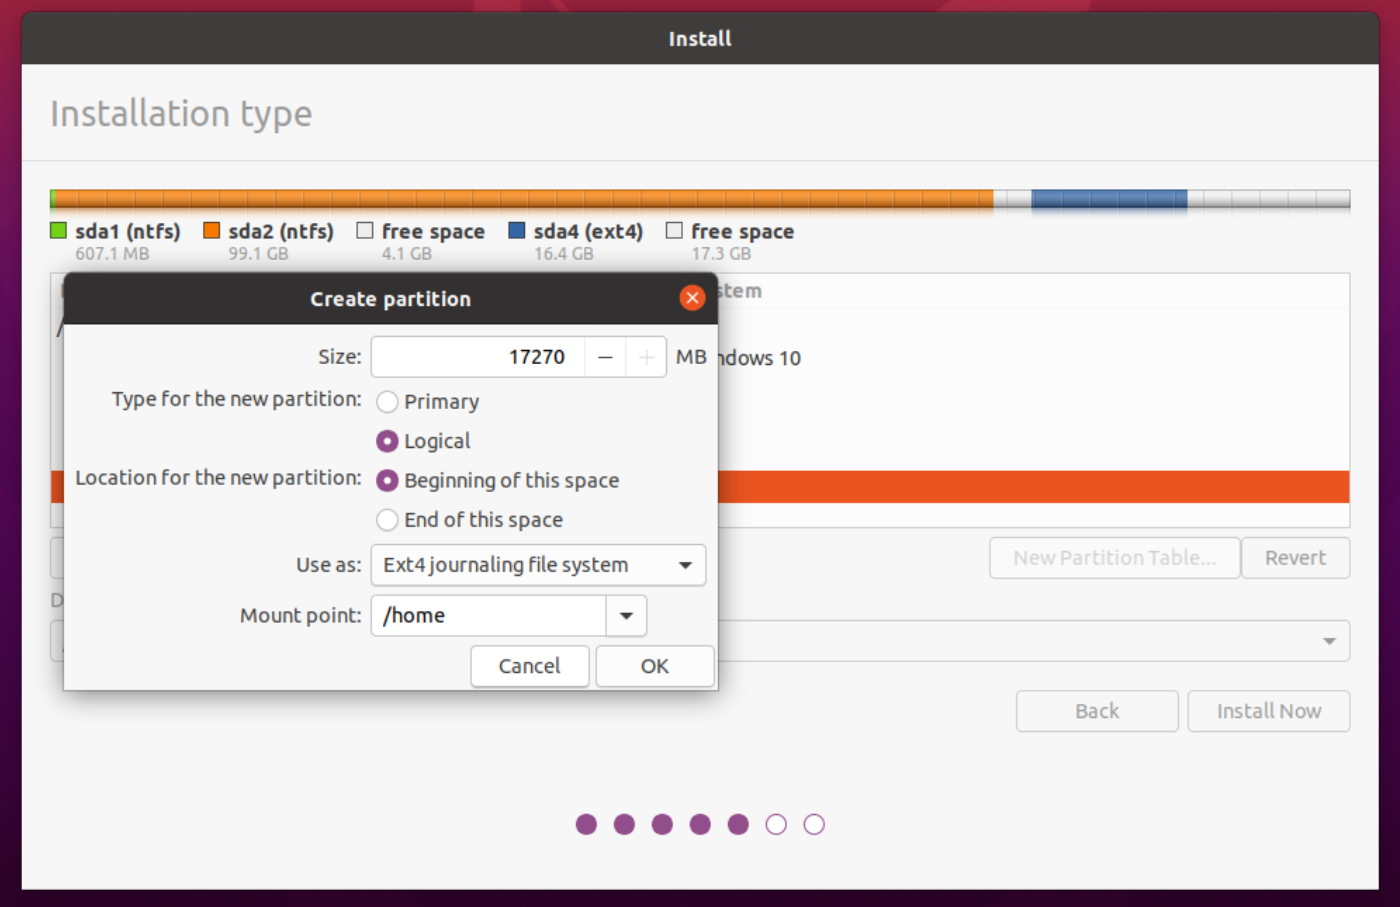
Your last partitioning will be the "home" partition. Over again, click on the plus icon to create a new partition and dedicate the remaining space to this partition. Again, select it to be a "Logical" partition and again choose the "Ext4" file system. This time, the mount point is "/home".
This sectionalization volition store all your personal files. If you exercise not create a separate "habitation" sectionalization, your personal files will exist stored within the "root" division. The reason why I create information technology every bit a separate partition is, that you can follow the same procedure to create a partition on a second hard drive. This is peculiarly useful when your "root" division is on a SSD bulldoze while your personal files are on a HDD drive. My setup did non have two difficult drives, only the procedure would be the same, except that you demand to pay attending which free infinite is used for the "root" and which for the "home" partition.
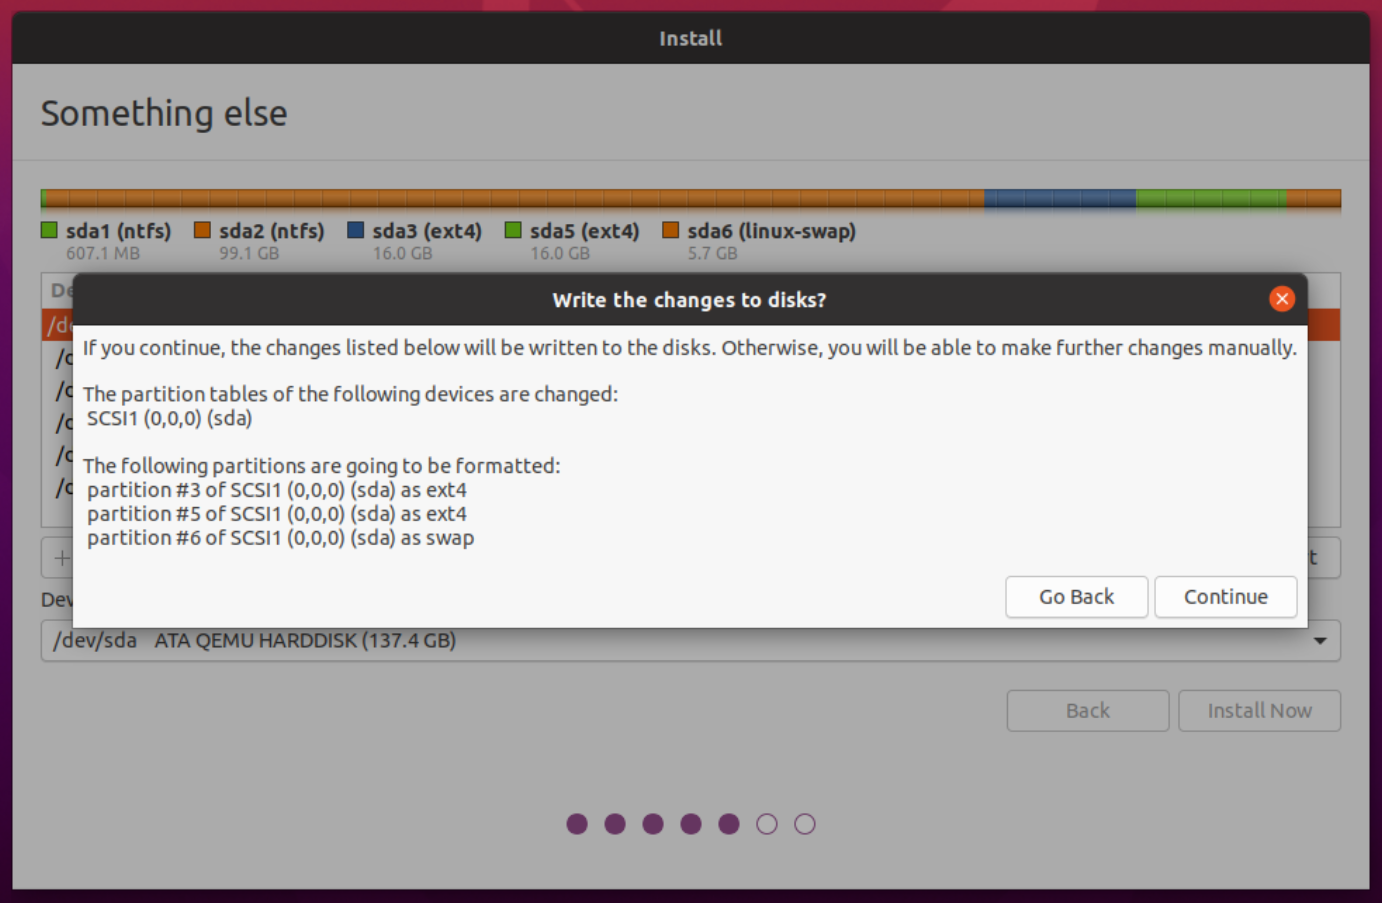
Now that all the partitions have been created, you should not have whatever gratuitous space left. Brand sure the boot loader volition be installed on the correct hard drive. Unremarkably, this is the same drive where your Windows x kick loader is installed. Hit the "Install Now" button and confirm the installation.
In the next step, you simply select the state where you lot are. This is simply to prepare the time zone for your organization clock. It also affects how the time is displayed such as the 12-hour format or 24-hour format, depending on your country's default system.

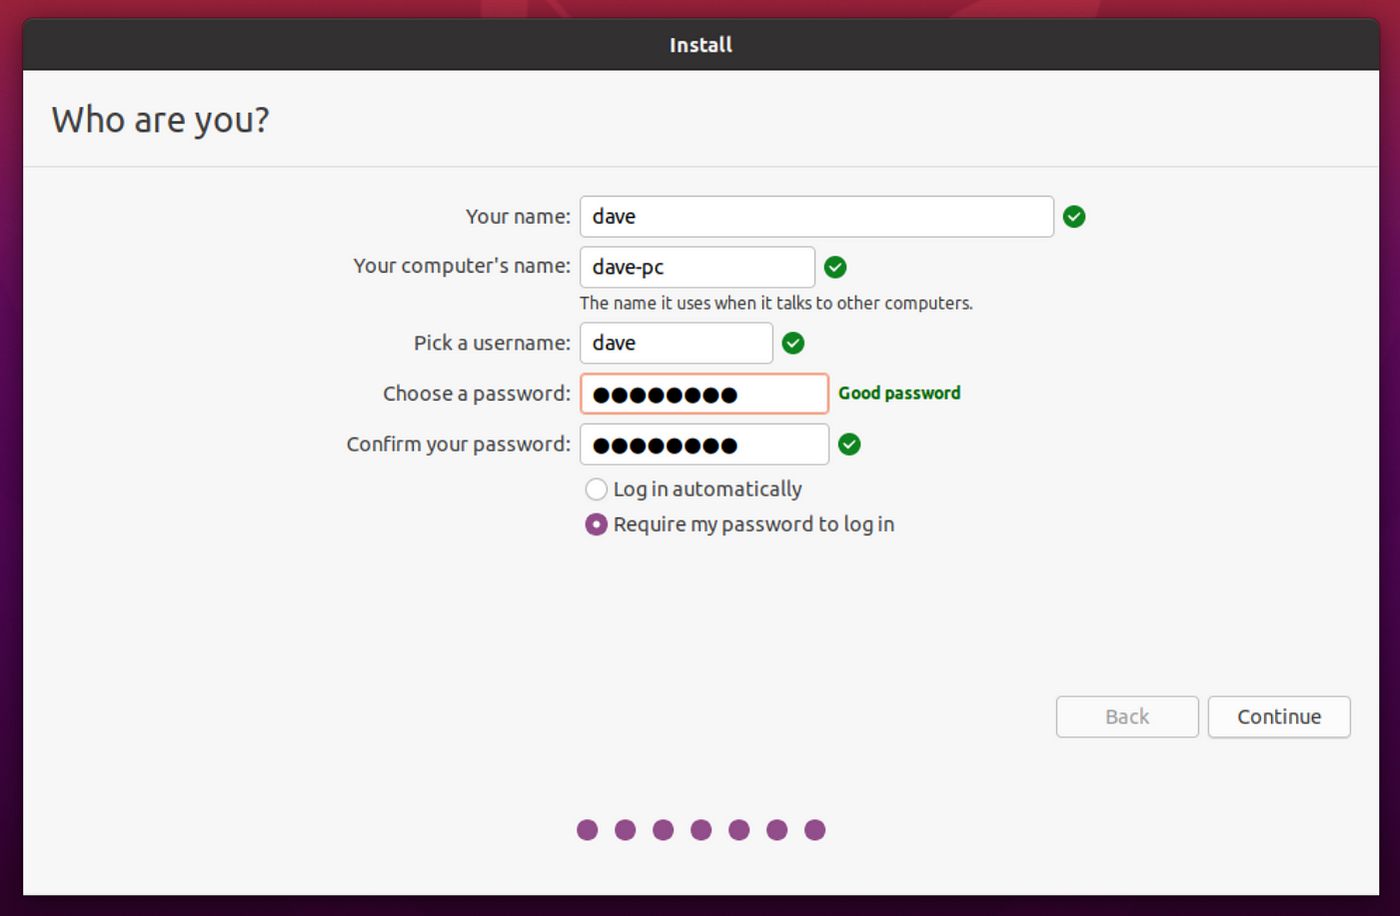
Lastly, you lot need to create your user business relationship on the system. Fill up in your proper noun and verify if the username that is suggested is fine for you. You tin as well change the name of the estimator. In the "Your name:" field, you lot are supposed to type your full proper name. Also, you need to set a password. It can be as long as you want, information technology can contain numbers, messages and symbols. Make sure it is a password you lot tin recollect as y'all volition need it every fourth dimension you install new software or yous want to update your system. Information technology should not be too easy though as this would make the countersign useless.
After yous gear up upwardly your user account, yous can click on the "Keep" button and the installation will be executed. Installing Ubuntu will non take a while. This procedure will probably take around twenty minutes, depending on your organization.
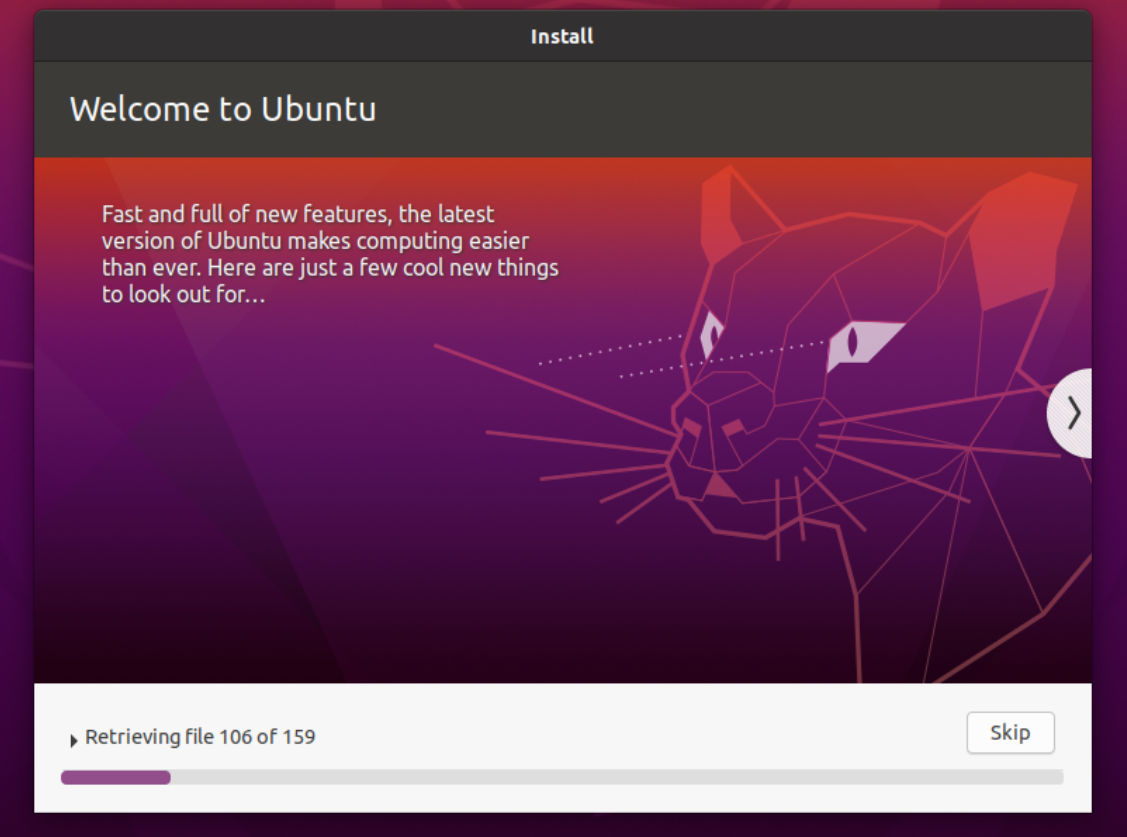
You do non need to do anything until the installation is finished. A expert time for another cup of tea.
After the installation is finished, you can restart the computer and remove the USB stick. Now, when the computer is starting, information technology will showtime bear witness to you the Grub boot screen.

The GRUB kick screen will bear witness you lot the installed systems such as Ubuntu and Windows 10. Now, every time you start your computer, you tin select which operating system you desire to use. Savour your Ubuntu system!
Endmost Thoughts
As you can see, the entire process is no wizardry. You just need to know which steps yous need to practise in order to proceed. There are many interesting Linux distributions such equally Manjaro, Solus, Fedora or Elementary OS. The installation procedure is normally quite similar. Of grade, you can as well go for another Ubuntu flavor such equally Kubuntu or the Ubuntu Unity Remix. The pick is up to you.
If you lot do not know which one to chose, information technology is never wrong to pic the default Ubuntu version to become started. It is very user friendly and has a big user base and also many tutorials and explanations that you can use as reference.

How To Dual Boot Ubuntu And Windows 10,
Source: https://medium.com/linuxforeveryone/how-to-install-ubuntu-20-04-and-dual-boot-alongside-windows-10-323a85271a73
Posted by: brownhinfore.blogspot.com
0 Response to "How To Dual Boot Ubuntu And Windows 10"
Post a Comment